
Discover the Tile visualizer tool to reimagine your home renovation projects effortlessly. Whether you’re updating a bathroom, revamping your kitchen, or redesigning an entire living space, this tool allows you to experiment with colors, patterns, and textures without lifting a single tile. Within minutes, you can visualize how different designs will transform your home, making your renovation process smarter, faster, and far more enjoyable.
Why a Tile Visualizer Tool Is Essential for Modern Renovation
Renovating a home can be overwhelming, especially when it comes to selecting the perfect tiles. The sheer variety of colors, textures, and patterns often leaves homeowners unsure about their choices. This is where a tile visualizer tool comes in.
Instead of imagining how tiles will look, you can see the finished space in real-time. The tool helps avoid costly mistakes, reduces stress, and ensures your choices match your vision perfectly.
Realistic Visualization: See a lifelike representation of your space with chosen tiles.
Time-Saving: Test multiple combinations instantly without visiting multiple stores.
Cost-Effective: Minimize returns or mismatched purchases by making confident decisions.
Getting Started: Preparing Your Space for Visualization
Before diving into the tool, it’s essential to prepare your renovation space. Proper preparation ensures that the visualization is accurate and effective.
Measure Your Area Accurately
Start with precise measurements of your room or wall. Include:
Length and width of walls or floors
Heights for vertical surfaces
Any obstructions like cabinets, furniture, or fixtures
Accurate dimensions allow the tile visualizer tool to render your space realistically.
Capture Clear Images
Some tools allow uploading photos of your existing room. To get the best results:
Take images in natural lighting
Avoid clutter in the frame
Capture multiple angles if possible
These steps provide a solid foundation for your digital renovation experiment.
Choosing the Right Tiles: Patterns, Colors, and Sizes
Once your space is ready, it’s time to explore tile options. A tile visualizer tool makes it easy to experiment without physical samples.
Consider Tile Materials
Different materials create different effects:
Ceramic: Durable and versatile for most rooms.
Porcelain: Perfect for high-traffic areas or wet spaces.
Natural Stone: Adds elegance but requires more maintenance.
Glass or Mosaic: Great for accent walls or decorative features.
Experiment with Patterns
Patterns can dramatically change a room’s appearance. Popular options include:
Herringbone: Creates dynamic visual interest.
Chevron: Adds a sophisticated touch to flooring or walls.
Grid or Subway: Classic, timeless layouts.
Random Mix: Perfect for eclectic or artistic designs.
Play with Color Combinations
Use the tool to test multiple color schemes:
Neutral tones for a calm, contemporary look
Bold contrasts for dramatic effects
Gradients or mixed shades for modern aesthetics
With the visualizer, you can instantly see how each choice interacts with lighting, furniture, and space dimensions.
Step-by-Step: Using the Tile Visualizer Tool Effectively
Here’s a practical guide to getting the most out of your tile visualizer tool.
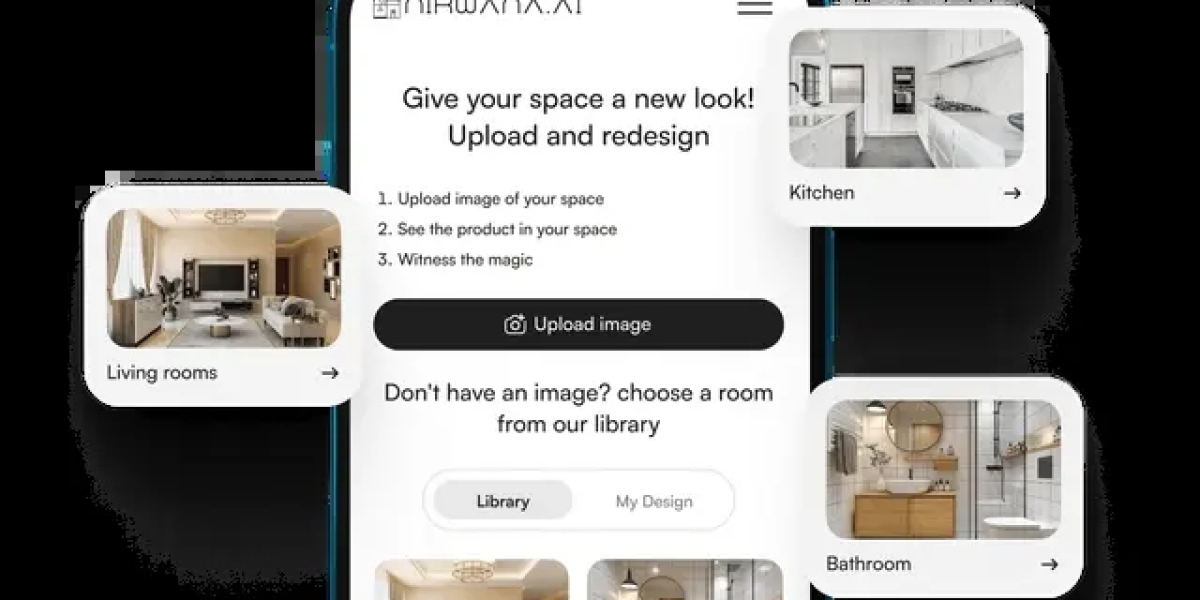
Step 1: Upload Your Space or Select a Template
Some tools let you start with a blank canvas, while others allow uploading photos of your actual room. Templates may also be available for standard layouts.
Step 2: Select Tiles and Patterns
Choose tiles based on:
Material and durability
Color palette
Shape and size
Many visualizers also let you apply multiple tiles on a single surface to create accent features or borders.
Step 3: Adjust Layout and Placement
Experiment with different layouts and orientations:
Horizontal or vertical alignment
Diagonal placement for dynamic effects
Mixed sizes for modern, artistic styles
Step back and assess the room’s balance and flow in the visualizer before finalizing choices.
Step 4: Preview in Different Lighting
Lighting can dramatically affect tile appearance. Use the tool to simulate:
Natural daylight
Warm indoor lighting
Cool, modern lighting
This ensures your tiles look perfect under all conditions.
Step 5: Save, Compare, and Share
Most visualizer tools allow saving multiple designs. You can:
Compare options side by side
Share with family or interior designers for feedback
Export design layouts for easier implementation
This step reduces uncertainty and provides a clear roadmap for your renovation.
Tips for Maximizing Your Tile Visualizer Experience
To get the best results from your tool, consider the following expert tips:
Test Focal Walls: Use the tool to preview accent walls before committing.
Mix and Match: Try different combinations of floor and wall tiles.
Check Real-Life Samples: Even after visualization, confirming texture and finish with samples can prevent surprises.
Use Measurement Guides: Many visualizers include grid overlays or dimension tools for precise layouts.
Iterate Frequently: Don’t settle on the first design. Experimentation often leads to unexpected, beautiful results.
Common Mistakes to Avoid
Even with advanced visualization, homeowners make avoidable mistakes. Here’s what to watch out for:
Ignoring Scale: Large tiles in small rooms may overwhelm the space.
Overcomplicating Patterns: Too many designs can make the room feel chaotic.
Neglecting Lighting: Tiles may look different under artificial lighting than on the screen.
Skipping Samples: Visuals may not perfectly match textures or gloss in real life.
Being mindful of these pitfalls ensures your virtual design translates seamlessly into reality.
FAQs About Tile Visualizer Tools
Can I use the tool for both floors and walls?
Yes. Most modern visualizer tools allow you to test tiles on any surface, including floors, walls, backsplashes, and even outdoor patios.
Are the results accurate to real-life colors?
While tools are highly realistic, it’s recommended to check physical samples before final purchase for exact color and finish.
Do I need special software or installation?
Most tile visualizer tools are browser-based or mobile-friendly, requiring no additional software.
Can I save multiple design versions?
Absolutely. You can create several layouts, compare them side by side, and choose the best option.
Real-Life Applications: Bringing Your Vision to Life
Many homeowners and interior designers have embraced tile visualizer tools to streamline renovations. Examples include:
Bathroom Makeovers: Visualizing contrasting floor and wall tiles before buying.
Kitchen Upgrades: Experimenting with backsplash designs to complement cabinets.
Living Room Floors: Trying different patterns like herringbone or large-format tiles.
By testing multiple scenarios, you reduce the risk of costly mistakes and make informed decisions with confidence.
The Future of Home Renovation: Digital Design Tools
Tile visualizer tools represent a shift in how we approach home renovation. They blend creativity with technology, making interior design accessible to everyone.
Faster Decision-Making: Digital previews reduce time spent debating styles.
Increased Confidence: Seeing results before installation minimizes uncertainty.
Collaboration-Friendly: Easily share designs with contractors, family, or designers.
These tools are becoming a standard in modern renovations, ensuring every project is both efficient and visually stunning.
Final Thoughts: Elevate Your Renovation Experience
Using a tile visualizer tool transforms home renovation from a stressful chore into an exciting creative journey. By experimenting with colors, patterns, and layouts digitally, you save time, money, and energy while ensuring your dream space becomes a reality. Whether updating a single room or designing an entire home, this tool empowers homeowners to make informed, confident decisions while exploring endless creative possibilities.